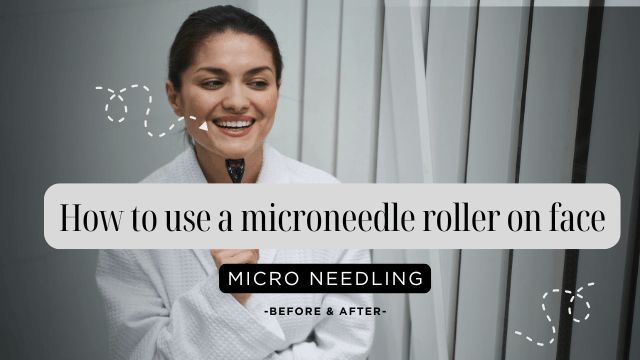
Como alguien que lleva años en el mundo del cuidado de la piel, he probado innumerables productos y herramientas que prometen resultados milagrosos. Cuando oí hablar de los rodillos de microagujas (también llamados dermarollers), me sentí intrigada y un poco aterrorizada. ¿Agujas diminutas rodando por mi cara? ¡Sonaba intenso! Pero después de investigar e incorporar esta herramienta a mi rutina, puedo decir con sinceridad que ha sido una auténtica revolución para la textura y el aspecto general de mi piel.
Si tienes curiosidad por probar la microaguja en casa, estoy aquí para guiarte a través del proceso y compartir lo que he aprendido en el camino.
Elija la longitud correcta de la aguja
Para uso facial en casa, recomiendo empezar con una aguja de entre 0,25 mm y 0,5 mm de longitud. Estas agujas más cortas son perfectas para la absorción del producto y una mejora leve de la textura sin ser demasiado agresivas. Empecé con 0,25 mm y solo fui aumentando la longitud hasta que mi piel se adaptó por completo.
Recuerde que las agujas más largas (superiores a 0,5 mm) deben utilizarse con precaución o dejarse en manos de profesionales, ya que penetran más profundamente y conllevan mayores riesgos si no se utilizan correctamente.
Prepara tus herramientas y tu piel
¡La limpieza es fundamental con la microaguja! Aquí está mi rutina previa al uso del rodillo:
- Esterilizo mi rodillo derma sumergiéndolo en alcohol isopropílico 70% durante al menos 10 minutos antes de cada uso.
- Mientras tanto, limpio bien mi rostro con un limpiador suave y lo seco con palmaditas.
- Aplico un tónico para asegurarme de que mi piel esté completamente limpia y equilibrada.
- Espero hasta que mi piel esté completamente seca antes de continuar. ¡Esto es crucial!
La técnica del rodamiento
Al principio, el proceso me ponía muy nervioso. Esta es la técnica que mejor me funciona:
- Divido mi cara en secciones: frente, mejillas, barbilla y alrededor de la boca.
- Sosteniendo el rodillo con un agarre suave pero firme, lo hago rodar en una dirección (verticalmente) 3 o 4 veces sobre cada sección.
- Luego hago rodar el rodillo horizontalmente sobre la misma zona 3 o 4 veces.
- Finalmente ruedo en diagonal 3 o 4 veces.
- Sólo aplico una ligera presión, la suficiente para sentirlo, pero nunca la suficiente para causar dolor o sangrado.
Para zonas delicadas como la nariz, uso movimientos más pequeños y controlados. La zona bajo los ojos requiere mucho cuidado; de hecho, utilizo un rodillo aparte, más pequeño, diseñado específicamente para esta piel delicada, y lo paso con la mayor suavidad posible.
Cuidados posteriores al laminado
¡Este paso es tan importante como el uso del rodillo! Al terminar, mi piel está más receptiva a los productos, pero también más vulnerable. Esto es lo que hago:
- Aplico inmediatamente un sérum hidratante y calmante: el ácido hialurónico es perfecto, ya que no irrita e hidrata profundamente.
- Evito cualquier ingrediente activo como retinol, vitamina C o exfoliantes químicos durante al menos 24 horas después de usar el rodillo.
- Aplico una crema hidratante suave y nutritiva para fijar todo.
- A la mañana siguiente, soy muy estricta con la aplicación de FPS 50, ya que mi piel está más fotosensible después del tratamiento.
Frecuencia y mantenimiento
Al principio, usaba mi rodillo de 0,25 mm una vez a la semana para ver cómo respondía mi piel. Tras un mes sin reacciones adversas, aumenté la frecuencia a dos veces por semana. Con un rodillo de 0,5 mm, nunca lo uso más de una vez a la semana.
En cuanto al mantenimiento, cambio mi rodillo cada 2 o 3 meses, incluso si se ve bien. Las agujas se desgastan con el tiempo, lo que puede causar más daño a la piel que beneficio. Después de cada uso, lavo el rodillo con agua tibia y jabón, lo rocío con alcohol y lo dejo secar al aire por completo antes de guardarlo en su estuche.
Escucha tu piel
La lección más importante que he aprendido es prestar atención a lo que mi piel me dice. Si noto enrojecimiento que dura más de 24 horas, sensibilidad inusual o cualquier signo de irritación, dejo de usar la microaguja hasta que mi piel esté completamente curada.
También he aprendido a adaptar mi agenda a los eventos sociales. Como mi piel suele verse un poco enrojecida después de usar el rodillo, evito hacerlo antes de ocasiones importantes y me doy al menos dos o tres días de tiempo de "recuperación" antes de eventos importantes.
La microaguja en casa se ha convertido en una parte gratificante de mi rutina de autocuidado. Los resultados no se notaron de la noche a la mañana, pero tras unos dos meses de uso constante, noté una mejor textura, un tono más uniforme y una reducción de algunas cicatrices antiguas de acné.
Si decides probarlo, recuerda que la paciencia y la técnica adecuada son fundamentales. Tu piel es única y tu experiencia puede ser diferente a la mía. Pero con un enfoque cuidadoso y expectativas realistas, un rodillo de microagujas podría convertirse en el nuevo mejor amigo de tu piel, como lo ha sido para mí.
¿Has probado la microaguja en casa? ¡Me encantaría leer tu experiencia en los comentarios!

