google.com, pub-2032008856654686, DIRECT, f08c47fec0942fa0

Microneedling Pimple Patch

Discover the revolutionary Microneedling Pimple Patch. Combat stubborn blemishes with advanced technology, faster healing, and scar prevention. Say goodbye to frustrating acne and hello to clear, radiant skin.

The Microneedling Pimple Patch is a revolutionary skincare solution designed to combat the stubborn and unsightly blemishes that often plague our skin. Created with advanced microneedling technology, this innovative patch helps to effectively target and treat pimples, promoting faster healing and preventing the formation of scars. By utilizing tiny micro-needles, the patch creates microchannels on the skin’s surface, allowing potent ingredients to penetrate deep into the affected area. With its discreet and easy-to-use design, the Microneedling Pimple Patch offers a convenient and hassle-free way to achieve clear and radiant skin. Say goodbye to frustrating acne and hello to a complexion you can proudly show off.

Microneedling Pimple Patch

What is Microneedling Pimple Patch

Definition of microneedling pimple patch

A microneedling pimple patch is a small adhesive patch that contains tiny microneedles. These microneedles, usually made of medical-grade materials like silicone or hydrocolloid, penetrate the skin’s surface when applied to a pimple. The purpose of these patches is to provide targeted treatment for pimples by delivering active ingredients directly into the skin.

Purpose of microneedling pimple patch

The primary purpose of a microneedling pimple patch is to treat acne and pimples effectively. By penetrating the surface of the skin, the microneedles in the patch allow active ingredients to reach the deeper layers of the skin, where they can combat bacteria, reduce inflammation, and promote healing. These patches are designed to provide a convenient and hygienic way to address individual pimples without the need for harsh topical treatments or invasive procedures.
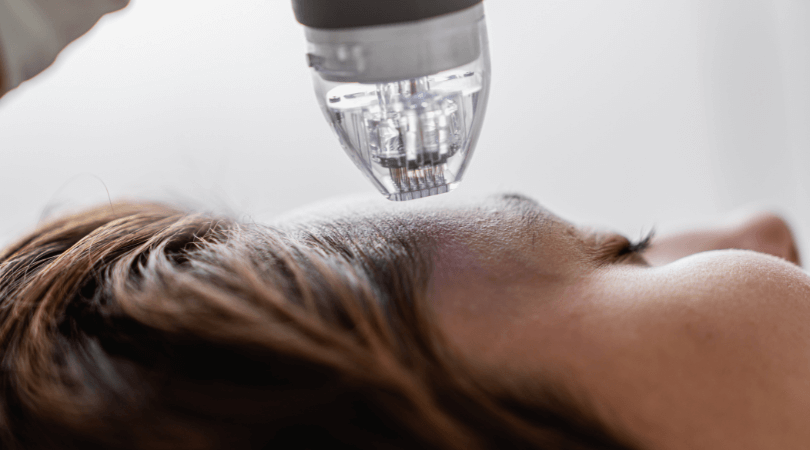
How it works

When a microneedling pimple patch is applied to a pimple, the microneedles gently puncture the skin’s surface, creating tiny channels. These channels allow for the absorption and delivery of active ingredients, such as salicylic acid, hyaluronic acid, or tea tree oil, directly into the affected area. These ingredients work to combat bacteria, reduce inflammation, and promote healing. The patch also creates a protective barrier that prevents further contamination from external factors like dirt or bacteria, while simultaneously absorbing excess oil and sebum from the pimple.

Benefits of Microneedling Pimple Patch

Reduces pimple size

One of the significant benefits of using a microneedling pimple patch is its ability to reduce the size of a pimple. The combination of microneedling and active ingredients allows for targeted treatment, helping to shrink the pimple and minimize its visibility. By effectively delivering the ingredients into the deeper layers of the skin, the patch can provide fast and noticeable results.

Promotes faster healing

Microneedling pimple patches aid in the healing process of acne and pimples by delivering active ingredients directly into the affected area. These ingredients help to speed up the regeneration of skin cells, reduce the appearance of redness and irritation, and promote the formation of new, healthy skin. By accelerating the healing process, these patches can help pimples clear up more quickly and minimize the risk of scarring.

Prevents scarring

Scarring is a common concern for individuals with acne-prone skin. Microneedling pimple patches can help prevent scarring by delivering active ingredients that reduce inflammation and promote healing. By addressing the pimple at its early stages and providing a protective barrier, these patches can minimize the risk of scarring and help the skin recover more smoothly.

Reduces inflammation

Inflammation is a key factor in the development and progression of acne and pimples. Microneedling pimple patches contain ingredients that have anti-inflammatory properties, such as tea tree oil or chamomile extract. These ingredients work to calm and soothe the inflamed skin, reducing redness and swelling associated with pimples. By reducing inflammation, these patches can help promote a clearer complexion.

Improves skin texture

Alongside its ability to treat pimples, microneedling pimple patches also contribute to improving overall skin texture. The microneedles in the patch create microchannels that stimulate collagen production in the skin. Collagen is crucial for maintaining skin elasticity and a smooth complexion. By promoting collagen synthesis, these patches can help improve the texture and appearance of the skin, leaving it looking more youthful and radiant.

Enhances absorption of skincare products

One of the advantages of microneedling pimple patches is their ability to enhance the absorption of other skincare products. By creating microscopic channels in the skin, the patches increase the permeability of the skin barrier, allowing for better absorption of active ingredients from serums, moisturizers, or spot treatments. Applying a patch prior to using other skincare products can maximize their efficacy and deliver better results.

Microneedling Pimple Patch

How to Use Microneedling Pimple Patch

Cleanse the affected area

Before applying a microneedling pimple patch, it is crucial to cleanse the affected area thoroughly. Use a gentle cleanser to remove any dirt, oil, or makeup from the skin. Pat the area dry with a clean towel to ensure optimal adhesion of the patch.

Peel off the protective film

Carefully peel off the protective film from the microneedling pimple patch, being cautious not to touch the microneedles directly. The film is usually located on the side of the patch that will come into contact with the skin.

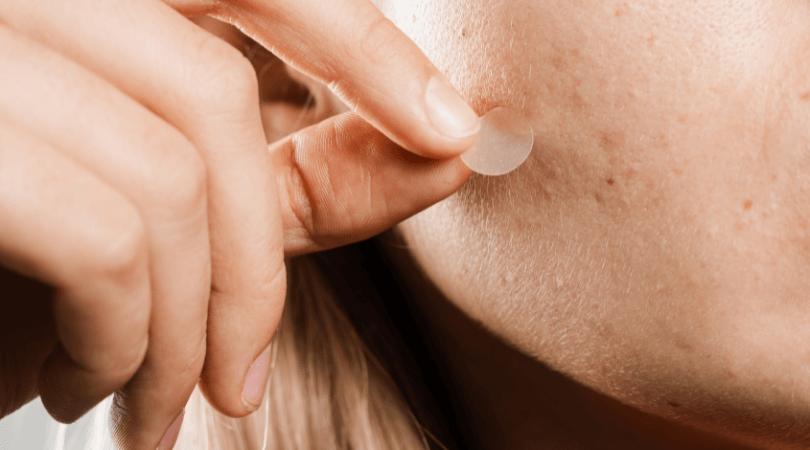
Apply the patch directly on the pimple

Place the adhesive side of the patch directly over the pimple, aligning the microneedles with the center of the blemish. Gently press down on the patch to ensure proper adhesion.

Leave it on for recommended duration

Each microneedling pimple patch may have a recommended duration for application. It is essential to follow the instructions provided by the manufacturer to maximize the effectiveness of the patch. In most cases, the patches are left on for several hours or overnight.

Remove the patch gently

After the recommended duration has passed, carefully remove the microneedling pimple patch. Peel it off slowly and gently to avoid causing any discomfort or irritation to the skin.

Dispose of properly

Once the patch has been removed, dispose of it properly. Most microneedling pimple patches are designed for single-use only, so it is important not to reuse them. Place the used patch in a sealable bag or trash bin to maintain hygiene.

Choosing the Right Microneedling Pimple Patch

Consider the size and shape of the patch

When choosing a microneedling pimple patch, consider the size and shape that would best suit your needs. Some patches are specifically designed for larger pimples or can be easily cut to fit smaller blemishes. Evaluating the size and shape of the patches will allow you to select one that provides optimal coverage and efficacy.

Check the ingredients

Take the time to read and evaluate the ingredients used in the microneedling pimple patch. Look for patches that contain active ingredients known for their effectiveness in treating acne, such as salicylic acid, witch hazel, or niacinamide. Avoid patches that contain ingredients that may cause irritation or allergies.

Look for additional skincare benefits

Some microneedling pimple patches offer additional skincare benefits beyond acne treatment. These patches may contain ingredients like hyaluronic acid for hydration or collagen-boosting peptides for anti-aging effects. Consider your specific skincare needs and preferences when choosing a patch that offers these additional benefits.

Read customer reviews

Before purchasing a microneedling pimple patch, it can be helpful to read customer reviews or seek recommendations from trusted sources. Real-life experiences and feedback from other users can provide valuable insights into the effectiveness and usability of different patches. Consider both positive and negative reviews to make an informed decision.

Precautions and Potential Side Effects

Avoid using on open wounds or broken skin

It is essential to avoid using microneedling pimple patches on open wounds or broken skin. The microneedles can cause further irritation or damage to these areas and may delay the healing process. If you have any open wounds or broken skin, it is advisable to wait until the skin has fully healed before using the patches.

Do a patch test on a small area

If you are using a microneedling pimple patch for the first time, consider doing a patch test on a small area of skin before applying it to the entire face. This can help identify any potential allergic reactions or sensitivities to the ingredients in the patch. Apply a small piece of the patch to the inner arm or behind the ear and leave it on for a few hours. If any redness, itching, or discomfort occurs, discontinue use.

Discontinue use if irritation occurs

If you experience any irritation, redness, itching, or discomfort while using a microneedling pimple patch, discontinue use immediately. Some individuals may be more sensitive to the microneedles or the ingredients in the patch. It is always better to prioritize the health and well-being of your skin and consult a dermatologist if necessary.

Consult a dermatologist if you have sensitive skin or any concerns

If you have sensitive skin or any concerns regarding the use of microneedling pimple patches, it is advisable to consult a dermatologist before incorporating them into your skincare routine. A dermatologist can provide personalized advice based on your skin type, previous experiences, and any specific concerns you may have. They can recommend suitable products or alternative treatment options if necessary.

Alternative Acne Treatment Options

Topical creams

Topical creams containing ingredients like benzoyl peroxide or retinoids are common treatments for acne. These creams are applied directly to the affected areas and work to reduce inflammation, kill bacteria, and promote skin cell turnover. They can be used alongside microneedling pimple patches for a comprehensive acne treatment routine.

Oral medications

In more severe cases of acne, oral medications may be prescribed by a dermatologist. Antibiotics, hormonal medications, or isotretinoin can be used to address the underlying causes of acne and reduce its severity. Oral medications are typically recommended when other treatment options have not been effective.

Chemical peels

Chemical peels involve the application of a chemical solution to the skin, which exfoliates the top layers and promotes the growth of new, healthier skin. Chemical peels can be effective in treating acne by reducing inflammation, minimizing the appearance of scars, and improving overall skin tone and texture. It is important to consult a professional for proper administration and guidance.

Blue light therapy

Blue light therapy involves exposing the skin to a specific wavelength of blue light, which targets the bacteria that contribute to acne. This therapy can help reduce inflammation and kill bacteria, resulting in fewer breakouts. Blue light therapy is often used as an alternative treatment for individuals who are unable to tolerate or prefer not to use topical or oral medications.

Natural remedies

Many individuals prefer to explore natural remedies for acne treatment. Ingredients like tea tree oil, lavender oil, aloe vera, or green tea extract have been touted for their anti-inflammatory and antibacterial properties. While natural remedies can be gentle and effective for some individuals, it is important to note that scientific evidence may be limited, and results may vary.

Frequently Asked Questions

Can microneedling pimple patches be used on all skin types?

Microneedling pimple patches are generally safe for all skin types. However, individuals with sensitive skin should exercise caution and do a patch test before applying the patch to the entire face. If any irritation occurs, it is advisable to discontinue use. Consulting a dermatologist can provide personalized guidance if you have specific concerns regarding your skin type.

How frequently should the patches be used?

The frequency of microneedling pimple patch usage depends on the severity of your acne and the instructions provided by the manufacturer. Some patches may be used daily, while others are designed for single-use or overnight application. It is important to follow the recommended usage instructions to avoid overuse or potential skin irritation.

Can the patches be worn overnight?

Many microneedling pimple patches are designed to be worn overnight. This allows for prolonged contact between the active ingredients and the skin, maximizing their effectiveness. However, it is crucial to read the instructions provided by the manufacturer, as some patches may not be intended for overnight use. Ensure that proper adhesion is maintained throughout the night to prevent the patch from detaching.

Are microneedling pimple patches safe for pregnant or breastfeeding individuals?

While microneedling pimple patches are generally considered safe for use, it is advisable for pregnant or breastfeeding individuals to consult with a healthcare professional before introducing any new skincare products into their routine. This precaution ensures the safety and well-being of both the individual and the baby.

Do microneedling pimple patches work for cystic acne?

Microneedling pimple patches can provide some relief for cystic acne by reducing inflammation and promoting healing. However, it is important to note that the effectiveness of these patches may vary depending on the severity and individual response to treatment. Cystic acne often requires a comprehensive approach involving professional medical advice and treatment.

Microneedling Stamp

Discover the benefits of microneedling stamp, a revolutionary tool for rejuvenating the skin. Stimulate collagen production, improve texture, reduce wrinkles, and enhance product absorption. Learn how to properly use and choose a microneedling stamp for optimal results.

In the world of skincare, the microneedling stamp has emerged as a revolutionary tool, providing a simple yet effective solution for improving the texture and appearance of the skin. This innovative beauty device incorporates tiny needles that gently puncture the surface of the skin, stimulating collagen production and enhancing the absorption of skincare products. As a result, the microneedling stamp has gained tremendous popularity among individuals seeking to address various skin concerns, such as wrinkles, acne scars, and uneven skin tone. With its promise of rejuvenation and long-lasting results, the microneedling stamp has become a sought-after solution for those looking to achieve a youthful and radiant complexion.

What is a Microneedling Stamp?

A microneedling stamp is a skincare device that uses tiny needles to create controlled micro-injuries on the skin’s surface. It is designed to stimulate collagen production, improve skin texture, reduce fine lines and wrinkles, and enhance product absorption. The stamp usually consists of a handle, which is used to press the needles into the skin, and a head with multiple needles that penetrate the skin’s surface when applied.

Definition and Purpose

The microneedling stamp is a handheld tool used to perform microneedling, a minimally invasive cosmetic procedure. Its purpose is to stimulate the skin’s natural healing process, resulting in the production of collagen and elastin, which are essential for maintaining healthy, youthful-looking skin.

How it Works

The microneedling stamp works by creating tiny punctures in the skin’s surface. These micro-injuries trigger the skin’s natural repair mechanism, stimulating the production of collagen and elastin. The stamp’s needles are typically made of medical-grade stainless steel and come in different lengths, ranging from 0.5mm to 2.0mm. The depth of the punctures depends on the selected needle length and the specific skin concern being addressed.

Benefits of Using a Microneedling Stamp

Using a microneedling stamp can offer numerous benefits for the skin, making it a popular choice among skincare enthusiasts and professionals alike. Let’s explore some of the key advantages:

Stimulates Collagen Production

One of the primary benefits of using a microneedling stamp is its ability to stimulate collagen production. Collagen is a protein that gives the skin its structure and elasticity. As we age, collagen production naturally declines, leading to the development of fine lines, wrinkles, and sagging skin. By creating controlled micro-injuries, the microneedling stamp prompts the body to produce more collagen, helping to improve skin firmness and elasticity.

Improves Skin Texture

Microneedling with a stamp can also help improve skin texture by stimulating the production of collagen and elastin. This can minimize the appearance of pores, refine uneven skin tone, and smoothen rough patches. Regular use of a microneedling stamp can result in a smoother and more refined complexion.

Reduces Fine Lines and Wrinkles

Another significant benefit of microneedling is its effectiveness in reducing the appearance of fine lines and wrinkles. The controlled micro-injuries created by the stamp stimulate collagen and elastin production, which can help plump up the skin, making fine lines and wrinkles less noticeable. Consistent use of a microneedling stamp can contribute to a more youthful and rejuvenated appearance.

Enhances Product Absorption

Microneedling with a stamp can significantly improve the absorption of skincare products. The tiny channels created by the microneedles allow for better penetration of serums, creams, and other topical products into the deeper layers of the skin. This enhanced absorption ensures that the active ingredients in these products can effectively target specific skin concerns and deliver optimal results.

microneedling Derma Stamp MTS

Improves Skin Tone and Pigmentation

If you struggle with uneven skin tone or pigmentation issues, microneedling with a stamp can be beneficial. The controlled micro-injuries created during the procedure stimulate the skin’s natural healing process, promoting the production of new, healthier skin cells. Over time, this can lead to a more even skin tone and improved pigmentation, reducing the appearance of sunspots, acne scars, and other discolorations.

Reduces Scars and Acne Marks

Microneedling with a stamp can be an effective treatment for reducing the appearance of scars and acne marks. The microneedles create controlled injuries that stimulate collagen production and encourage the skin to remodel itself. This can help flatten and fade scars, making them less noticeable. However, it is important to note that treatment for more severe scarring may require professional assistance.

These are just a few of the benefits of using a microneedling stamp. It is important to note that individual results may vary, and it is recommended to consult with a dermatologist or skincare professional before incorporating this procedure into your skincare routine.

MTS Microneedling DERMA STAMP

Experience advanced skincare with the Super Ultra Fine Beauty 140 Derma Stamp MTS

Product Currency: USD

Product Price: 30

Product In-Stock: InStock

Editor's Rating:
5

Pros

  • 1. Enhanced Product Absorption: The 0.25mm ultra-fine needles create micro-channels in the skin, significantly improving the absorption of serums and essences. This ensures that your skincare products work more effectively, delivering nutrients directly to where they are needed most.
  • 2. Minimal Discomfort: Despite involving needles, the ultra-fine size of 0.25mm ensures that the process is as comfortable as possible, making it suitable for those who are new to microneedling.
  • 3. Improved Skin Texture: Regular use can lead to noticeable improvements in skin texture. By stimulating the skin's natural healing process, it helps to reduce the appearance of fine lines, wrinkles, and scars, leading to smoother and more youthful-looking skin.
  • 4. Easy to Use: The derma stamp is designed for easy handling, allowing for precise application. Its simple press-and-release action makes it suitable for home use, eliminating the need for professional assistance.

Cons

  • 1.Regular Maintenance Required: To prevent infection and maintain the effectiveness of the derma stamp, regular cleaning and maintenance are necessary. This might be a hassle for some users.
  • 2. Potential for Overuse: Users might get carried away with the ease of use and overuse the device, leading to skin irritation or damage. It's crucial to follow recommended usage guidelines.
  • 3. Initial Discomfort and Redness: While minimal, some users may experience slight discomfort or redness immediately after use, especially if they have sensitive skin.
  • 4. Results May Vary: As with any skincare tool, results can vary from person to person. Some users may see significant improvements quickly, while others may need to use the tool for a longer period before noticing changes.

How to Use a Microneedling Stamp

While microneedling with a stamp can be done at home, it is essential to follow the proper procedure and take necessary precautions to ensure safety and optimal results. Here is a step-by-step guide on how to use a microneedling stamp:

Preparation

  1. Start by thoroughly cleansing your face to remove any makeup, dirt, or oil. This ensures that the microneedles can penetrate the skin without any barriers.
  2. Disinfect the microneedling stamp by soaking it in a sterilizing solution or rubbing alcohol for a few minutes. This step helps prevent the spread of bacteria and infections.
  3. Prepare any serums or skincare products you intend to use during the microneedling session.
  4. Gently pat your face dry with a clean towel.

Procedure

  1. Hold the microneedling stamp by the handle, making sure to grip it firmly but not too tightly.
  2. Starting from the center of your face, gently press the microneedling stamp onto the skin, applying even pressure.
  3. Move the stamp in a rolling or stamping motion across your face, covering the desired treatment areas. Be careful not to apply excessive pressure or create excessive wounds.
  4. Continue stamping until you have covered the entire face or focused on specific areas of concern.
  5. After each stamp, lift the device slightly before reapplying to avoid dragging or tearing the skin.
  6. Once you have completed the treatment, apply your chosen serums or skincare products, taking advantage of the enhanced absorption that microneedling provides.
  7. Cleanse the microneedling stamp thoroughly with a sterilizing solution or rubbing alcohol after use. Ensure it dries completely before storing it in a clean, dry place.

It is important to note that microneedling should be performed with caution, and if you are unsure or have any concerns, it is advisable to seek guidance from a dermatologist or skincare professional.

Choosing the Right Microneedling Stamp

Selecting the right microneedling stamp is crucial to ensure both safety and effectiveness. Here are some key factors to consider when choosing a microneedling stamp:

Needle Length

Microneedling stamps are available in various needle lengths, ranging from 0.5mm to 2.0mm. The appropriate needle length depends on your specific skin concern and the area being treated. Longer needles are generally used for treating scars and wrinkles, while shorter needles are suitable for general skincare maintenance.

Quality and Sterilization

When choosing a microneedling stamp, it is essential to select a high-quality product made from medical-grade stainless steel. This ensures the durability and safety of the device. Additionally, ensure that the stamp has been properly sterilized or is easily sterilizable before each use to prevent infections.

Comfort and Safety Features

Look for a microneedling stamp that offers comfort and safety features such as a non-slip handle, ergonomic design, and removable/replaceable stamp heads. These features can enhance your experience, allowing for better control and minimizing the risk of accidents.

It is always recommended to purchase microneedling stamps from reputable brands or seek professional advice to ensure you are using a reliable and safe device.

microneedling Derma Stamp

Precautions and Safety Measures

While microneedling can provide numerous benefits, it is important to take precautions and follow safety measures to avoid any adverse effects. Here are some key precautions to consider:

Consultation with a Dermatologist

Before starting microneedling at home, it is advisable to consult with a dermatologist or skincare professional. They can assess your skin condition, determine the suitability of microneedling for your concerns, and provide guidance on the best approach to achieve your desired results.

Sanitization and Cleaning

Ensure that both your skin and the microneedling stamp are thoroughly cleaned and sanitized before each use. This helps prevent bacterial infections and ensures the safety of the procedure.

Avoidance in Certain Conditions

Microneedling should be avoided or used with caution in certain conditions, including active acne breakouts, eczema, psoriasis, rosacea, open wounds, sunburns, and skin infections. It is important to be aware of your skin’s condition and consult with a professional if you have any concerns.

Aftercare and Recovery

After undergoing microneedling with a stamp, it is important to follow proper aftercare and recovery steps to optimize results and minimize potential side effects. Here are some key aftercare measures to consider:

Skin Care Routine

Follow a gentle skincare routine after microneedling, focusing on hydrating and soothing the skin. Avoid using harsh or irritating products and opt for gentle cleansers, moisturizers, and serums. It is also important to avoid any exfoliating or abrasive treatments for several days post-microneedling.

Avoiding Sun Exposure

Direct sun exposure should be avoided for at least 24-48 hours after microneedling. The skin’s barrier function may be compromised, making it more susceptible to sunburn and damage. If exposure is inevitable, apply a broad-spectrum sunscreen with a high SPF to protect your skin.

Possible Side Effects and Remedies

Mild redness, dryness, and slight swelling are common side effects after microneedling. These typically subside within a few days. To alleviate discomfort, you can apply a soothing moisturizer or cooling gel. It is important to avoid picking at scabs or peeling skin, as this can lead to infections or scarring.

If you experience any severe or prolonged side effects, such as excessive bleeding, persistent pain, or signs of infection, it is crucial to seek medical attention immediately.

Frequently Asked Questions (FAQs)

Here are some commonly asked questions about microneedling stamps:

What is the recommended needle length?

The recommended needle length depends on the specific skin concern. Shorter needles (0.5mm to 1.0mm) are typically used for general skincare maintenance, while longer needles (1.5mm to 2.0mm) are suitable for treating scars and wrinkles. It is advisable to consult with a dermatologist or skincare professional to determine the appropriate needle length for your needs.

How long does it take to see results?

The time it takes to see noticeable results varies from person to person and depends on factors such as the needle length used, the specific skin concern being addressed, and individual skin response. Generally, it may take several weeks to a few months to see significant improvements in skin texture, wrinkles, and pigmentation.

Can microneedling be performed at home?

Microneedling can be performed at home, but it is important to follow proper guidelines and safety measures. If you are unsure or have any concerns, it is recommended to seek professional advice or have the procedure performed by a trained skincare professional.

Is the procedure painful?

The level of discomfort during microneedling can vary from person to person. Some individuals may experience minimal discomfort or a mild prickling sensation, while others may find it slightly more uncomfortable. However, the use of topical numbing creams or gels can help minimize any potential pain or discomfort.

Can everyone use a microneedling stamp?

While microneedling can benefit many individuals, it may not be suitable for everyone. It is advisable to consult with a dermatologist or skincare professional, especially if you have any underlying skin conditions or are currently taking any medications that may affect your skin’s sensitivity..

How To Microneedle Face?

Learn how to microneedle your face for a smoother complexion. Discover what microneedling is, its benefits, and step-by-step instructions for safe and effective microneedling.

If you’ve been curious about microneedling and want to learn how to do it on your face, you’ve come to the right place! In this article, we will guide you through the process of microneedling your face, explaining what it is, why it’s beneficial, and providing step-by-step instructions on how to safely and effectively perform this skincare procedure. So get ready to achieve a smoother and more youthful complexion through the art of microneedling!

Understanding Microneedling

What is Microneedling?

Microneedling is a cosmetic procedure that involves using a handheld device with tiny needles to create controlled micro-injuries on the skin. These micro-injuries stimulate the body’s natural healing process and encourage the production of collagen and elastin, which are essential for healthy, youthful-looking skin.

What are the Benefits of Microneedling?

Microneedling offers a wide range of benefits for the skin, making it a popular choice among individuals seeking to improve their complexion. Some of the key benefits include:

  1. Skin rejuvenation: Microneedling stimulates collagen and elastin production, which results in firmer, smoother, and more youthful-looking skin.

  2. Reduced appearance of scars: Microneedling can help improve the appearance of acne scars, surgical scars, and stretch marks by promoting collagen remodeling.

  3. Fine line and wrinkle reduction: The increase in collagen and elastin production helps to minimize the appearance of fine lines and wrinkles, giving the skin a more youthful appearance.

  4. Improved skin texture and tone: Microneedling can help to even out skin tone, reduce hyperpigmentation, and improve the overall texture of the skin.

  5. Increased absorption of skincare products: The microchannels created by the needles allow for better absorption of topical skincare products, maximizing their effectiveness.

Types of Microneedling Tools

There are various types of microneedling tools available on the market, each offering different needle sizes and mechanisms. Here are the most common types:

  1. Derma roller: This handheld device consists of a roller with numerous tiny needles attached to it. It is rolled over the skin to create micro-injuries.

  2. Microneedling pen: Also known as an electronic microneedling device, this tool features a pen-like design with a disposable tip containing multiple needles. The pen is moved over the skin, creating controlled micro-injuries.

  3. Microneedling stamp: This tool has a small stamp-like head with needles protruding from it. It is pressed onto the skin to create the desired micro-injuries.

microneedling Derma Stamp MTS

It’s important to choose a microneedling tool that suits your specific needs and skin concerns. Consulting with a dermatologist or skincare professional can help you make an informed decision.

Precautions before Microneedling

Before undergoing a microneedling procedure, it’s essential to take certain precautions to ensure optimal results and minimize the risk of complications. Here are some key precautions to keep in mind:

  1. Avoid sun exposure: It is crucial to protect your skin from the sun’s harmful rays for at least a week before the procedure. Sunburned or tan skin can increase the risk of adverse reactions.

  2. Discontinue certain skincare products: Some skincare products containing active ingredients like retinoids or acids may sensitize the skin. It’s advisable to discontinue their use a few days before the procedure as per your dermatologist’s recommendations.

  3. Inform your doctor about medications: If you are taking any medications or have any underlying medical conditions, it’s important to notify your dermatologist beforehand. Certain medications, such as blood thinners, may need to be paused temporarily to minimize the risk of bleeding.

  4. Avoid waxing or exfoliating: Refrain from waxing or using abrasive exfoliants on the treatment area for at least a week before the procedure to prevent skin irritation or sensitivity.

By following these precautions, you can ensure a safer and more effective microneedling experience.

Preparing for Microneedling

Consultation with a Dermatologist

Before proceeding with microneedling, it is advisable to schedule a consultation with a dermatologist or skincare professional. During this consultation, the dermatologist will evaluate your skin type, discuss your concerns and expectations, and determine if microneedling is suitable for you. They will also recommend the appropriate type of microneedling tool and treatment plan tailored to your specific needs.

Skin Preparation

Preparing your skin before a microneedling session can help optimize the results and minimize potential complications. Here are some steps to follow during the pre-treatment skin preparation:

  1. Cleanse your skin: Thoroughly cleanse your face using a gentle cleanser to remove any dirt, oil, or makeup. Avoid using harsh or abrasive cleansers that may irritate the skin.

  2. Mild exfoliation: Use a mild exfoliator to gently slough off any dead skin cells, allowing the microneedling tool to penetrate more effectively. Avoid abrasive or harsh exfoliants to prevent skin irritation.

  3. Hydrate your skin: Properly hydrate your skin by moisturizing with a lightweight, non-comedogenic moisturizer. Well-hydrated skin ensures better needle glide over the skin and reduces the risk of discomfort.

Choosing the Right Microneedling Tool

The choice of microneedling tool depends mainly on your specific skin concerns, the area being treated, and personal preference. Consult with your dermatologist to determine the most appropriate tool for your needs. Factors to consider include needle length, needle material, and the tool’s ease of use.

Gather Required Supplies

Before starting the microneedling process, gather all the necessary supplies to ensure a smooth and hassle-free procedure. Some essential supplies include:

  1. Microneedling tool of your choice
  2. Numbing cream (if using)
  3. Sterile alcohol wipes for disinfection
  4. Hyaluronic acid or other serums for post-treatment nourishment
  5. Soothing sheet mask for post-treatment relaxation
Microneedling With Stem Cells

Having all the supplies ready in advance will help streamline the microneedling process and ensure a more comfortable experience.

Performing Microneedling

Step 1: Cleanse Your Face

Thoroughly cleanse your face using a mild cleanser to remove any dirt, oil, or remnants of skincare products. This step ensures that your skin is clean and ready for the microneedling procedure.

Step 2: Apply Numbing Cream (Optional)

If you have a low pain tolerance or are concerned about discomfort during microneedling, you may choose to apply a numbing cream. Numbing creams containing lidocaine or other topical anesthetics can help minimize any potential discomfort. Follow the instructions provided with the numbing cream and allow sufficient time for it to take effect before proceeding to the next step.

Step 3: Start Microneedling

Hold the microneedling tool at a 45-degree angle and gently move it across your skin in a vertical, horizontal, or diagonal pattern. Apply light pressure and let the needles do the work. Avoid excessive pressure, as it can lead to skin irritation or damage.

Step 4: Adjusting Needle Depth

Depending on the area being treated and your skin’s sensitivity, you may need to adjust the needle depth. Be cautious when adjusting the needle depth and follow the manufacturer’s instructions to avoid any injuries.

Step 5: Microneedling Patterns

Experiment with different microneedling patterns to ensure thorough coverage of the treatment area. Some common patterns include vertical, horizontal, or diagonal strokes. Be mindful not to over-microneedle any particular area.

Step 6: Treating Specific Areas

Pay extra attention to specific areas of concern, such as acne scars or fine lines. Spend a little more time and focus on these areas to maximize the potential benefits of microneedling.

Step 7: Treating the Neck and Decolletage

You can also extend the microneedling treatment to the neck and decolletage areas for overall skin rejuvenation. Use the same technique and care as for the face.

Step 8: Completing the Microneedling Session

Once you have completed the desired treatment, gently wipe your skin with a sterile alcohol wipe to remove any remaining debris, serum, or blood. Follow this by applying a soothing sheet mask or a hydrating serum to calm and nourish your skin after the microneedling session.

Post-Microneedling Care

Applying a Soothing Mask

After microneedling, it’s beneficial to apply a soothing mask to calm the skin and promote healing. Look for masks specifically designed for post-microneedling use, as they often contain ingredients like aloe vera or hyaluronic acid to soothe and hydrate the skin.

Aftercare Instructions

Your dermatologist or skincare professional will provide you with detailed aftercare instructions tailored to your specific needs. Generally, aftercare instructions may include:

  1. Avoid touching your treated skin for at least 24 hours to minimize the risk of infection.
  2. Use a gentle cleanser and lukewarm water to cleanse your face for the next few days.
  3. Apply a nourishing and hydrating serum or moisturizer to keep the skin moisturized.
  4. Avoid using makeup, especially heavy or oil-based products, for at least 24 hours after the microneedling session.
  5. Protect your skin from the sun by using a broad-spectrum sunscreen with at least SPF 30.

Following these aftercare instructions is crucial in maintaining the health and appearance of your skin post-microneedling.

Avoiding Sun Exposure

After microneedling, your skin becomes more sensitive to the sun’s harmful rays. It is essential to avoid excessive sun exposure and protect your skin by wearing a wide-brimmed hat, using a broad-spectrum sunscreen, and seeking shade whenever possible. Sun protection helps prevent sunburn, hyperpigmentation, and other sun-related damage.

Using Gentle Skincare Products

During the post-microneedling phase, it’s important to opt for gentle skincare products that won’t irritate or sensitize the treated skin. Avoid using products with harsh ingredients, fragrances, or exfoliating properties. Stick to soothing and hydrating products that promote skin healing and do not disrupt the recovery process.

Avoiding Makeup

To allow your skin to recover fully, it’s advisable to avoid applying makeup for at least 24 hours after the microneedling session. Makeup can clog the freshly created microchannels and potentially introduce bacteria, increasing the risk of infection or irritation. Once the recommended time has passed, you can gradually reintroduce makeup products, ensuring they are non-comedogenic and gentle on the skin.

Avoiding Exercise and Sweating

Engaging in intense physical activities and sweating profusely immediately after microneedling is not recommended. Sweat can irritate the treated skin and potentially lead to infection. It’s best to avoid exercise, saunas, or hot showers for at least 24 hours following the procedure.

Monitoring Your Skin

After microneedling, monitor your skin for any signs of adverse reactions, such as excessive redness, itching, or prolonged swelling. Immediately contact your dermatologist if you experience any concerning symptoms or have any questions or uncertainties about your recovery process.

How To Microneedle Face?

Microneedling Frequency and Results

Frequency of Microneedling Sessions

The frequency of microneedling sessions varies depending on individual needs and treatment goals. Typically, a series of treatments spaced four to six weeks apart is recommended for optimal results. Your dermatologist will assess your skin and provide a personalized treatment plan based on your specific concerns.

Expected Results

Microneedling results are typically gradual and progressive, with improvements becoming noticeable over time. Some expected results include:

  1. Improved skin texture and tone
  2. Reduction in the appearance of fine lines and wrinkles
  3. Diminished acne scars or other types of scars
  4. Reduction in hyperpigmentation or age spots
  5. Overall skin rejuvenation and a more youthful appearance

Keep in mind that individual results may vary, and multiple sessions may be necessary to achieve desired outcomes.

Potential Side Effects

While microneedling is considered safe for most individuals, there is a possibility of experiencing some side effects. These side effects are generally mild and temporary and may include:

  1. Redness: Mild redness may occur immediately after the procedure but should subside within a few hours to a few days.
  2. Swelling: Some swelling may be present, particularly in the first 24 to 48 hours. Applying a cold compress can help alleviate swelling.
  3. Dryness or flakiness: Your skin may feel dry or flaky for a few days following the procedure. Use a gentle moisturizer to keep your skin hydrated.
  4. Sensitivity: Your skin may be more sensitive than usual during the recovery period. Avoid harsh or irritating products until the skin has fully healed.

It’s essential to follow your dermatologist’s aftercare instructions to minimize the risk of side effects and ensure optimal healing.

Long-term Benefits

Microneedling offers long-term benefits for your skin’s health and appearance. By stimulating collagen and elastin production, microneedling can help improve the overall quality and resilience of your skin. The long-term benefits may include:

  1. Increased firmness and elasticity
  2. Improved skin texture and tone
  3. Prevention and reduction of fine lines and wrinkles
  4. Enhanced absorption of skincare products, allowing them to work more effectively
  5. Prolonged skin rejuvenation and maintenance of a youthful appearance

Maintaining a consistent skincare routine, regular follow-up treatments, and proper sun protection can help maximize the long-term benefits of microneedling.

Alternatives to Microneedling

While microneedling is an effective treatment for various skin concerns, there are alternative options available depending on your specific needs and preferences. Here are a few common alternatives to microneedling:

Chemical Peels

Chemical peels involve the application of a chemical solution to the skin, which causes controlled exfoliation and skin rejuvenation. They can help improve skin texture, reduce hyperpigmentation, and diminish the appearance of scars and wrinkles.

Laser Resurfacing

Laser resurfacing uses a laser device to deliver concentrated light energy to the skin, promoting collagen production and skin remodeling. It can effectively treat fine lines, wrinkles, acne scars, and hyperpigmentation.

Microdermabrasion

Microdermabrasion is a non-invasive procedure that exfoliates the outermost layer of the skin using a handheld device. It can improve skin texture, reduce fine lines, and minimize the appearance of mild scars and hyperpigmentation.

Topical Skincare Products

Topical skincare products containing active ingredients like retinoids, vitamin C, or hyaluronic acid can provide some benefits similar to microneedling. These products may help improve skin texture, reduce the appearance of fine lines, and enhance overall skin health.

When considering alternatives to microneedling, it’s crucial to consult with a dermatologist or skincare professional to determine the most suitable treatment option for your specific skin concerns.

Choosing a Microneedling Provider

When seeking a microneedling provider, it’s important to consider several factors to ensure a safe and effective treatment experience. Here’s a guide to help you choose the right microneedling provider:

Qualifications and Experience

Look for a provider with the appropriate qualifications, such as a licensed dermatologist, plastic surgeon, or skincare professional. Be sure to inquire about their experience in performing microneedling procedures and their knowledge of various skin types and concerns.

Sterilization and Safety Measures

Ensure that the microneedling provider follows strict sterilization protocols to prevent the risk of infections or skin complications. The tools and equipment used should be properly cleaned, sterilized, or disposed of after each treatment.

Client Reviews and Recommendations

Read reviews and testimonials from previous clients to gauge their satisfaction with the microneedling provider. Feedback from others who have undergone the same procedure can help you make an informed decision.

Pricing and Packages

Consider the pricing structure and any available packages offered by the microneedling provider. Be sure to inquire about any potential hidden costs and verify that the quoted price includes all necessary aftercare and follow-up visits.

Consultation and Communication

A reputable microneedling provider will offer a consultation session to assess your skin, address your concerns, and provide clear explanations of the treatment process and expected outcomes. Effective communication between you and the provider is essential to ensure a positive treatment experience.

Taking the time to research and choose a qualified and reliable microneedling provider will contribute to a safer and more successful procedure.

FAQs about Microneedling

Is Microneedling Painful?

Most individuals experience minimal pain or discomfort during microneedling. The sensation is often described as a slight tingling or pricking feeling. Applying a numbing cream prior to the procedure can further minimize any potential discomfort.

How Long Does a Microneedling Session Take?

The duration of a microneedling session depends on the size of the treatment area and the specific concerns being addressed. Typically, a session can take anywhere from 30 minutes to an hour.

Can Microneedling Be Done at Home?

While there are microneedling tools available for home use, it is generally recommended to seek professional treatment. Microneedling performed by a trained professional ensures proper technique, sterilization, and optimal results.

Is Microneedling Suitable for All Skin Types?

Microneedling is generally suitable for all skin types, but it’s important to consult with a dermatologist to determine if you are a good candidate. Individuals with active infections, certain skin conditions, or bleeding disorders may not be suitable for microneedling.

Are there Any Medical Conditions that Restrict Microneedling?

Certain medical conditions, such as active acne, eczema, rosacea, or open wounds, may contraindicate microneedling. It’s crucial to inform your dermatologist about any underlying medical conditions to ensure your safety and avoid potential complications.

How Soon Can I Wear Makeup after Microneedling?

It is advisable to avoid wearing makeup for at least 24 hours following a microneedling session. Once the recommended time has passed, you can gradually reintroduce makeup products, ensuring they are non-comedogenic and gentle on the skin.

Can Microneedling Cause Scarring?

When performed by a trained professional, microneedling should not cause scarring. In fact, microneedling is often used as a treatment to improve the appearance of scars. However, improper technique or inadequate aftercare can increase the risk of scarring.

Is Microneedling Effective for Acne Scars?

Microneedling has shown promising results in reducing the appearance of acne scars. By stimulating collagen production and promoting skin remodeling, microneedling can help improve the texture and overall appearance of acne scars.

Can Microneedling Treat Hyperpigmentation?

Microneedling has been proven to be effective in reducing hyperpigmentation. By promoting skin cell turnover and increasing the absorption of topical skincare products, microneedling can help minimize the appearance of hyperpigmentation and even out skin tone.

How Many Sessions of Microneedling are Needed for Optimal Results?

The number of microneedling sessions needed varies depending on individual factors, including the specific skin concern being treated and how your skin responds to the treatment. Generally, a series of four to six sessions spaced four to six weeks apart is recommended for optimal results. However, your dermatologist will provide a personalized treatment plan based on your unique needs.

en_USEnglish